|
Add Photo Overlays Last Updated 10/6/2014 9:16:45 AM |

|

|

|
|
|
Add Photo Overlays Last Updated 10/6/2014 9:16:45 AM |

|

|

|
Add Photo Overlays
Last Updated 10/6/2014 9:16:45 AM
|
Add Photo Overlays Last Updated 10/6/2014 9:16:45 AM |

|

|

|
|
|
Add Photo Overlays Last Updated 10/6/2014 9:16:45 AM |

|

|

|
|
Photo overlays can be added to a single image or multiple images if multiple images are selected. Photos overlays are applied on a per vehicle basis. Photo Overlays can also be applied with a rule and only apply to vehicles with "actual photos", they will not apply to stock photos or photos "Coming Soon Images".
Before adding Overlays to photos the actual Overlay needs to be created. Refer to Create Photo Overlays article for more information. |
1. Click on Vehicle tab.

2. Search for vehicle.

3. Access the "Photos" menu by one of the following methods:
•Click on vehicle picture and then clicking on ADD/EDIT PHOTOS button

OR
•Click on Vehicle Link and click on Photos from the Inventory Menu.

4. Click on Edit tab.
![]()
5. Click on Show Overlays button.
![]()
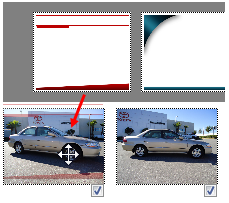
6. Select each photo or click on SELECT ALL to select photos that will receive the Overlay.

7. Drag overlay to the photo.

8. Overlay is applied to the selected photos.

9. Click on SAVE button at the bottom of the window.
